Lots of people have a Freebie Friday, so I thought I'd do something a bit different and do a 'Complimentary Thursday' tutorial.
We have a lot of autumn family birthdays, and hand stitching lots of cards can be very time consuming. Here's a quick way to make a hand embroidered card with an autumn theme, using my design on the freebies page. It uses simple stitches - plus you get to do colouring in!

You'll need:
A piece of cotton fabric, which will take crayon/pencil without 'bobbling'. I'd suggest you try your crayons on a scrap first to make sure you're happy.
Crayons*: bright red, pale brown and green. (If you have youngsters you can use theirs!)
Oil based coloured pencils work well too.
*If you want to use the design on something which will wash then use commercial fabric crayons and follow the manufacturer's instructions.
Embroidery needles size 7 and 8
Threads: Stranded cotton in bright red, dark brown, cream/ecru, white, grass green and various autumn shades for the leaves.
A 5 inch embroidery hoop
Transfer the design onto your fabric ( see the freebies page for ideas how to do this).
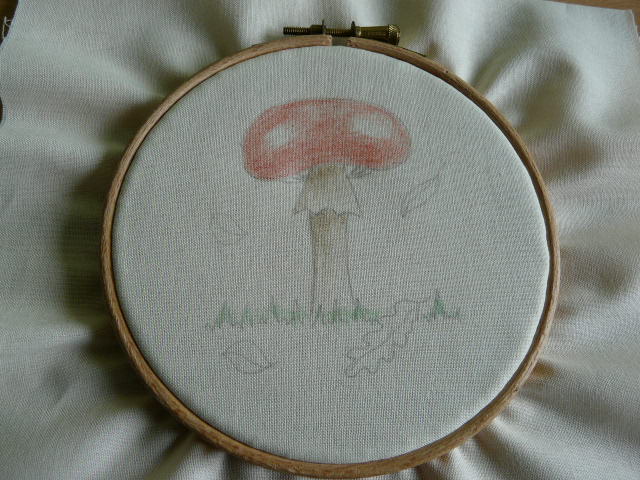
Colour in the toadstool cap in red, leaving some light areas so it looks like light is falling on it.


Add some green for the grass.

Place in your hoop and begin stitching,
Here's a very quick stitching guide.
Stem Stitch
I outlined the cap in one strand of red, with a size 8 needle.
Make a knot in your thread and bring up the needle up through the fabric.


Bring up the needle half way alongside the original stitch like so...
.
.

Re-insert the needle along the outline the same distance as your first stitch. This completes your second stitch.

Keep repeating this process and continue all around the outline of the cap.

The gills are also stitched in dark brown stem stitch using one thread.
Back stitch
The stem is back stitched in one strand of cream/ecru with a size 8 needle.
Make a knot in your thread and bring the needle up through the fabric a little in front of your starting point.

Make a straight stitch backwards.

Bring up your needle a little in front of your first stitch.

Re-insert your needle on the outline exactly where you completed the last stitch.


Chinese Knots
The white dots on the cap are Chinese Knots, which I like to do, but you can use French Knots, or even little straight stitches.
Make a knot in your thread and bring the needle up through the fabric.

Make a small loop in the thread, crossing it over.

This bit is important. Holding the loop in place with your thumb ( sorry I couldn't show this whilst taking the photo - not enough hands!) gently take the needle back down through the loop and bring out at the back of the fabric.

As the thread pulls through and gathers up it makes a knot.
Use 2 threads and a size 7 needle for larger dots and one thread and a size 8 needle for the smaller ones.

Scatter the dots across the cap, to make a pattern that pleases you.

Satin Stitch
The leaves are stitched with 2 threads. You can mix up a selection of autumn colours for these.
I'd advise starting in the middle of the leaf, as it's easier to make the bigger stitches first and work your way down to the small ones
Make a knot in your thread and bring up the needle up through the fabric on the outside of the leaf.

Re-insert it on the 'petiole' opposite( it's the middle leaf stem bit, I had to look that up!)

Pull the thread through to make a long stitch across the shape. Bring up the needle up again on the outline, at the place you began stitching. (Satin stitch should look the same on the back of the work as it does on the front).

Pull the thread through to make your second stitch. Repeat to fill in the shape, making the stitches smaller as you need to.

The grass is just created in straight stitches of various lengths using two strands of green thread.

If you want to mount your picture in a card aperture, it's nice to put some wadding behind it to give extra support.
I hope you found this tutorial useful - any comments /feedback would be really helpful, so please let me know as it will really help me plan the next one!
Cool tutorial Jules. Thank you. Maybe I should take up my needle and embroidary thread and do something like this. Gosh it has been years since I did any embroidary work.
ReplyDeleteHi Jules - What a beautiful project! I especially love the oak leaf with two colors! I have never tried a Chinese Knot stitch before - thank you for the tutorial.
ReplyDeleteKim
Wow, you've had quite a make-over here! I hadn't been physically on-blog for a while. All looks good!
ReplyDeleteWell done on your first tute and also congrats on getting your last posting listed on Craft Gossip! Did you get squads of visitors?? My goal is to be listed on the Country Bumpkin newsletter's blog section.....
Beautiful!!! You are so patient and very talented!
ReplyDeleteGreat tutorial. This is such a cute gift idea.
ReplyDeleteIts gorgeous, is it possible to use paint colors on it.
ReplyDeleteplastic card holders
plastic business cards
scratch cards printing
Fabulous...A lot of hardwork and concentration is needed.........
ReplyDeleteHank Hendricks
I have read your article and this is really impressive for new readers and this is such beneficial blog for developing knowledge about embroideries techniques.
ReplyDeleteThis article is very informative I've read this article for improving my embroidery skill and it's really worth it thanks for posting.
ReplyDeleteLove this beautiful Embroidered Autumn Card.. Your tutorial is very easy to understand and best way to kill time. A gift for those who love custom embroidery digitizing. Thanks.
ReplyDeleteI would say beautiful Embroidered Autumn Card, people usually love to get Embroidery Digitizing custom made gift on good fabric. Thank you :)
ReplyDelete